
In this blog post let’s understand how to add a lookup field in screen flow and how effectively this can be used in flow.
Table of Contents
Use Case
Create a Quick Action button on the Case record detail page. When clicked, the Account field should be automatically populated. The user can then add additional details and proceed to create the contact.
Lookup Field to a Screen Flow
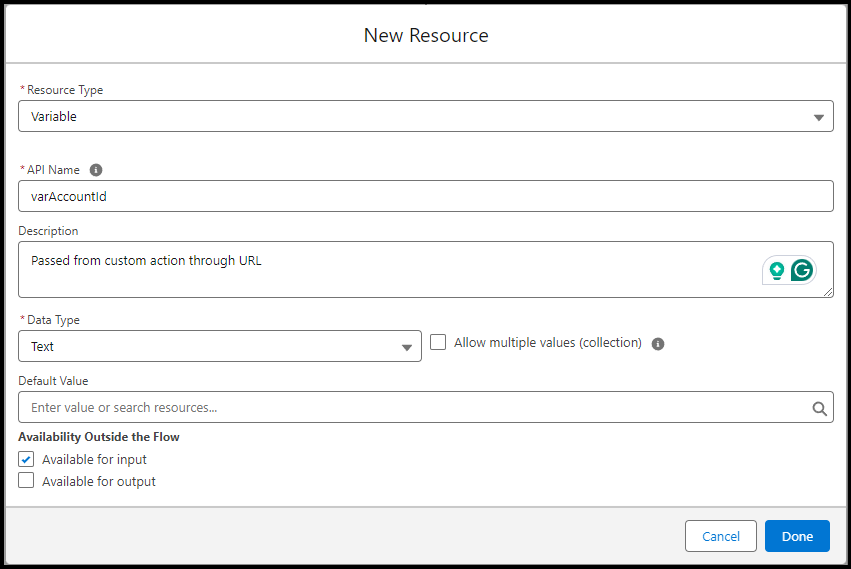
First, create a screen flow where the record ID will be passed from quick action through the URL. So to capture the account ID, the text variable is created as below.
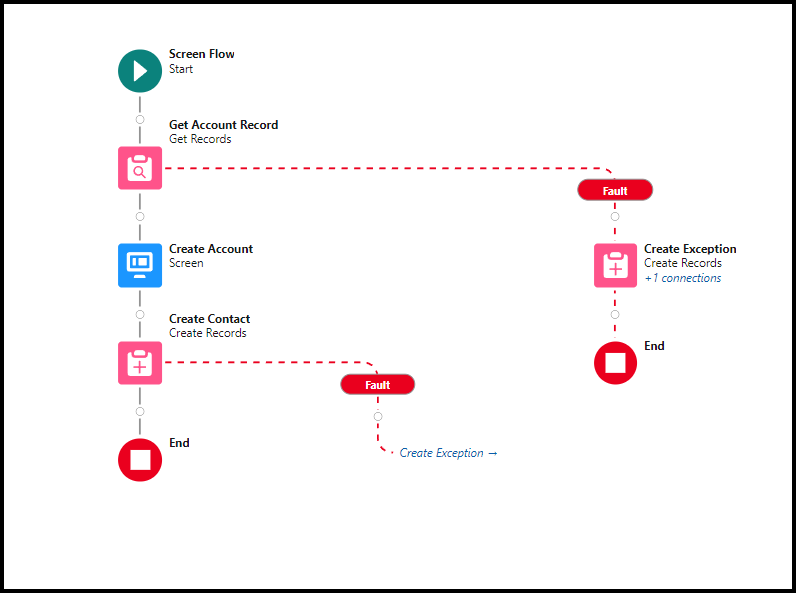
Then add the get Record element to get the account record as below.

Also, Read Custom Error in Salesforce Flow.
Prepopulate lookup field salesforce flow
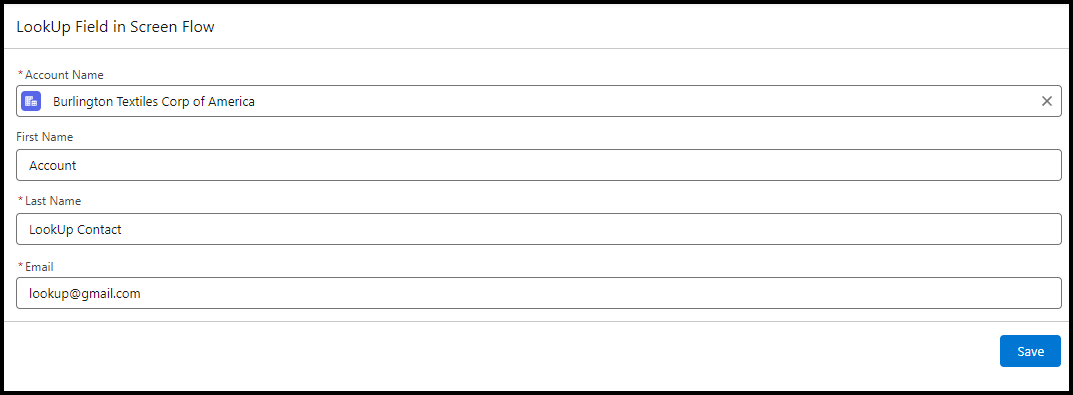
Next, we need a screen element to show the account name and contact mandatory fields to create an account.
Add a Screen element to the canvas and from the component section add a lookup field into the screen. Also, I have added other text and email fields as below.
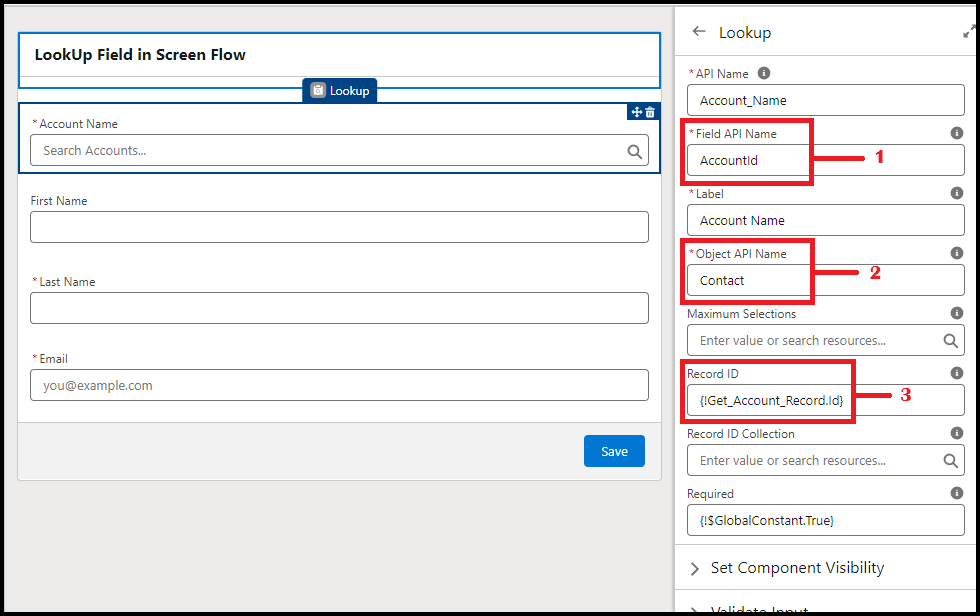
So, as you can see in the above screen,
- Field API Name: Add field API name here. [As I need to show the account from the contact object, so added the API name from contact].
- Object API Name: Add Object API name here. [Contact Object]
- Record Id: Add record ID here. [As I need to pre-populate the account, so added the account record ID, from the GET record element].
Note: Add lookup configuration API Name in case sensitive.
Then we need to create a contact record based on these input values. So added a create record element into the canvas. And mapped contact fields with screen flow fields as below.

Now we are done with our flow. Let’s see the final look at it.
Now let’s create a detail page button in the case object and let’s call the flow and pass the account Id as a parameter.
Go to case object, button and links then create button as below.
The variable created in flow is varAccountId. So keep the same naming convention in below URL format below as well, or else it will not work.
Syntax : /flow/flowName?varId={!Case.Id}&retURL={!Case.Id})
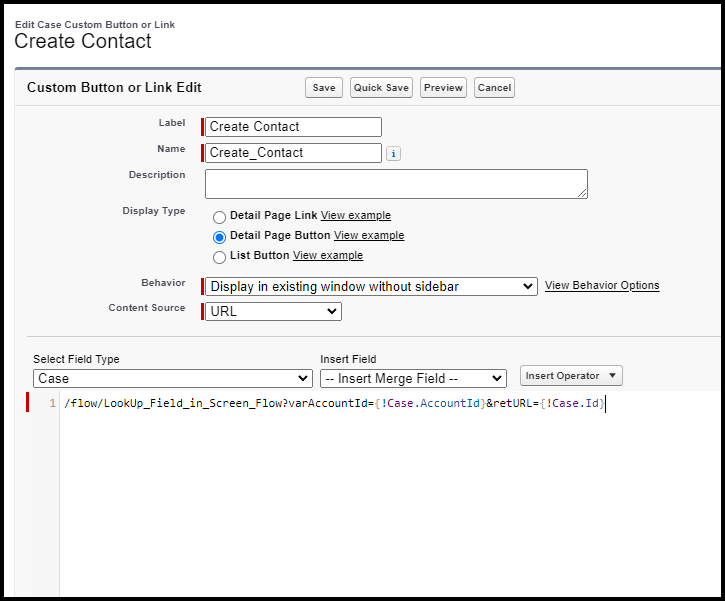
Once a custom button is created, make sure you are adding it to the page layout. Now we are all set, let’s test it out.
Outcome

Conclusion
In conclusion, by implementing a Quick Action button on the Case record detail page, the process of creating a contact is streamlined. The automatic pre-population of the Account field simplifies data entry, allowing users to quickly input additional information and efficiently complete the contact creation process. This enhances productivity and reduces the potential for manual errors. Feel free to add a comment for any support or additional queries.