If you’re a Salesforce user, you’re probably familiar with queues – a way to organize records and assign them to specific groups or teams. However, manually assigning records to a queue can be time-consuming and inefficient. That’s where Salesforce Flow comes in – a powerful tool that can help automate the process of assigning records to queues. In this blog post, we’ll show you how to assign records to queues using Salesforce Flow, step-by-step. If you have not followed our previous post related to flow, please check it out.
Table of Contents
What is Queue in Salesforce?
In Salesforce, a queue is a virtual storage area that enables users to manage and work on records as a team. Queues can be used to manage leads, cases, opportunities, and other types of records in Salesforce. By assigning records to a queue, users can easily share workloads and collaborate with each other to complete tasks efficiently.
Problem Statement
Whenever ever lead record is created with Lead Source as “Phone Inquiry” then assign the owner to the Phone Inquiry Leads queue.
Step 1: Create a Flow.
The first step is to create a new flow. To do this, go to Setup > Flows > New Flow. Select “Record-Triggered Flow” as the type of flow.
Step 2: Choose the Object and Trigger.
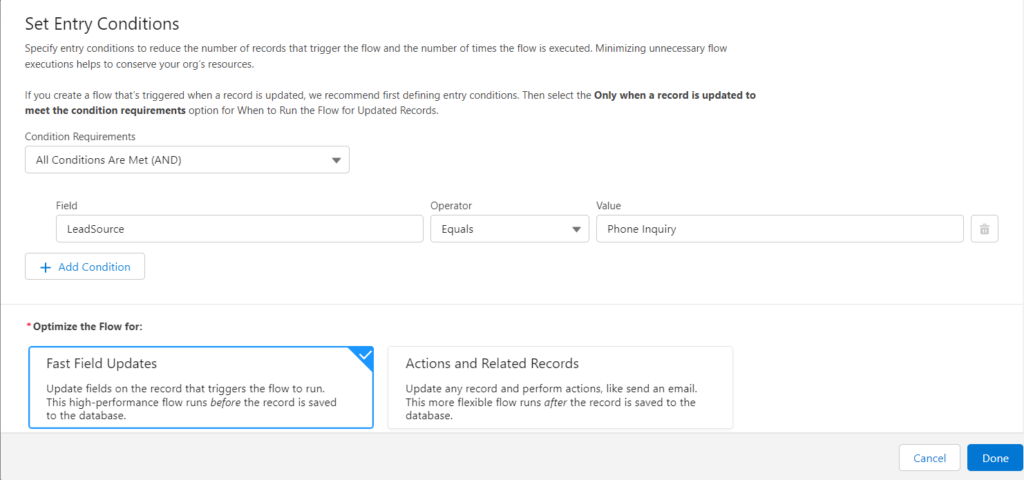
Next, choose the object you want to assign to a queue, such as Leads or Cases. Here we are choosing Lead. As we know the criteria to trigger the flow, hence
- configured the trigger when ” A record is created”.
- Add the entry conditions as leadSource Equals Phone Inquiry.
- And choose to Optimize the flow for “Fast Field Updates”.

Step 3: Add the Get Record Element.
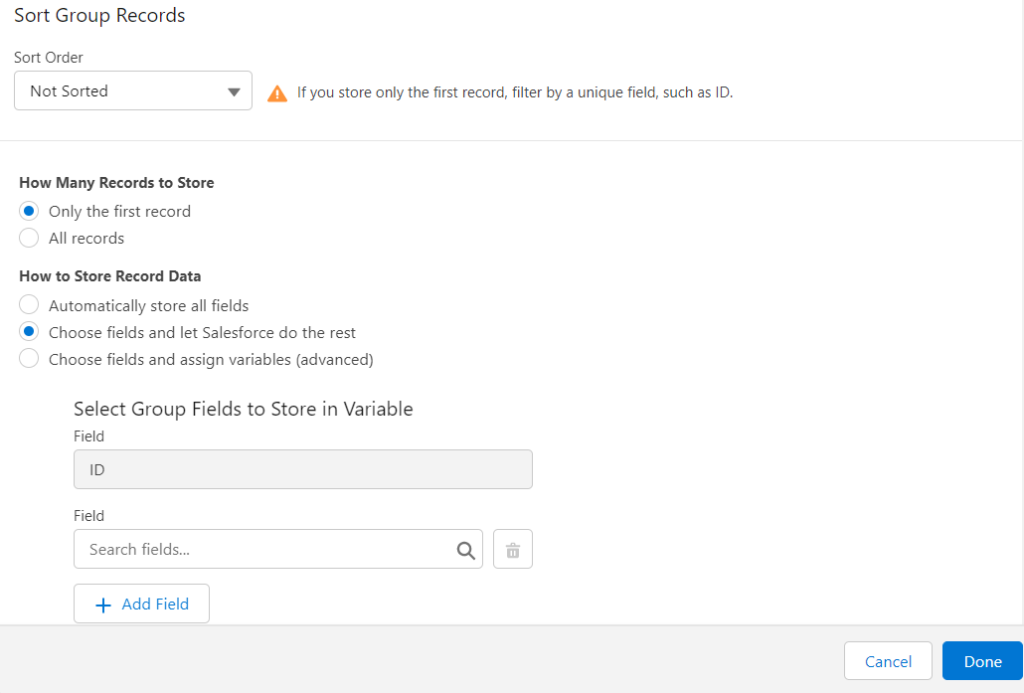
Add the Get record to the canvas and choose the Get Records of This Object as “Group” and then add the below filter record criteria i.e.,
- Add the label and API Name of the Get record element.
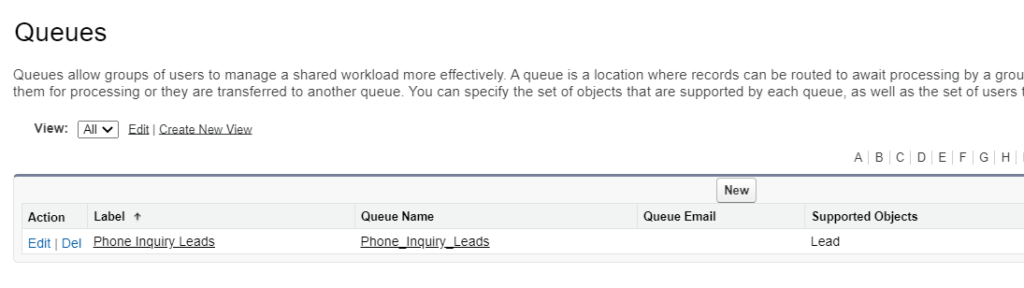
- Choose the field as Type Equals as Queue
- Choose DeveloperName Equals as the API name of Queue. In my case, i have a new Queue created as “Phone_Inquiry_Leads”.
- Choose How many records to store as “Only the first record”.
- Choose How to store record data as ” Choose fields and let Salesforce do the rest”.
- Then Click Done.

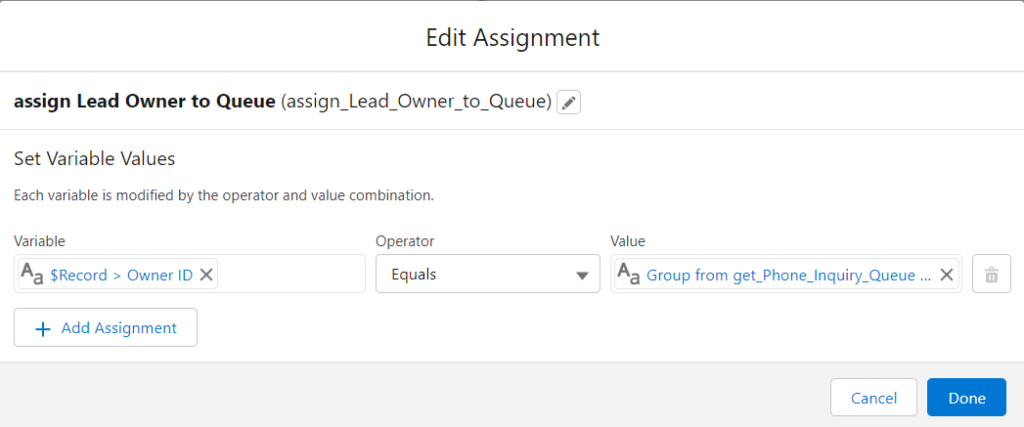
Step 4: Add an Assignment Element.
Once you’ve retrieved the record i.e. step 3, the next step is to assign it to a queue. To do this, add an assignment element to the flow canvas. In the “Set variable” section,
- select the field that represents the queue, such as “Owner ID.” of record equals the value as get the record. As per the below image.
- Then click done.
Read the best salesforce Books: Click Here.
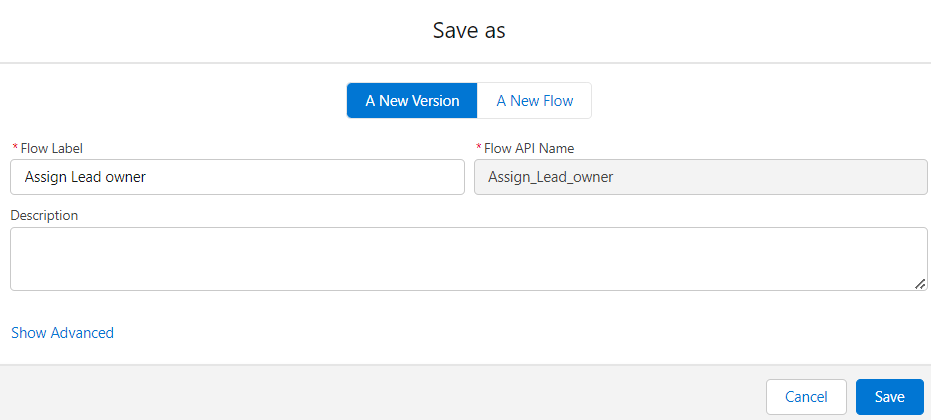
Step 4: Save the Flow
Conclusion

In this blog post, we showed you how to assign records to queues using Salesforce Flow. By following these simple steps, you can easily automate this process and ensure that your records are assigned to the appropriate queue. Remember to test your flow thoroughly before activating it to ensure that it works correctly. Also please follow our other flows blog posts.
Also Read
- Read the best salesforce Books: Click Here.
- HTTP Callout in Salesforce Flow Without Code [GET & POST]
- How to Invoke a Flow from a Lightning Web Component
- How to update child records using salesforce flow
- How to Assign records to Queue using Salesforce Flow?
- How to create a Data Table in Salesforce Flow : Complete Guide.
- How to retrieve record Type Id in flow
- How to navigate record detail page in flow
- How to send email using flow in salesforce
- How to Display Icon In Lightning Datatable
- How to Create Record in lightning Component
- How to Delete Multiple Records Using Checkbox In Lightning Component.
4 thoughts on “How to Assign records to Queue using Salesforce Flow?”