Hello Everyone in this post let’s understand how to send email using salesforce flow through using email alert and send email core action.
If you are not followed our previous blog post feel free to check it out. Salesforce Lightning Tutorial For Beginners.
Table of Contents
Objectives
After reading this blog, you will know how to write and send an email using Salesforce Flow.
Business Use Case
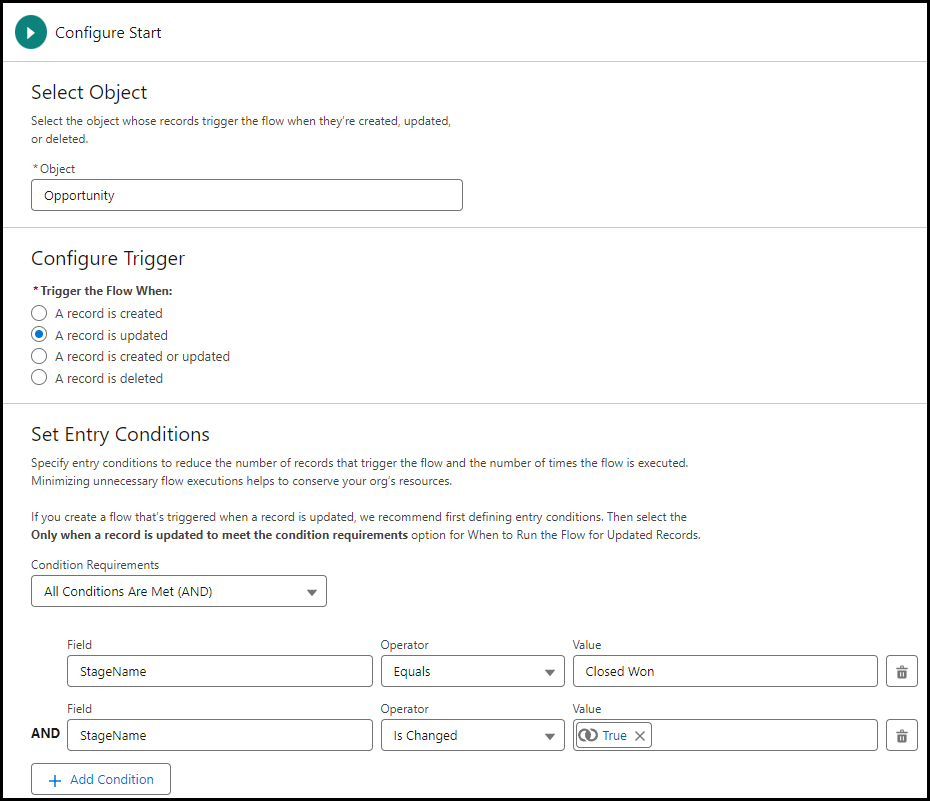
Send an email to the Opportunity owner when an opportunity is closed won. The email should include Opportunity details.
Two Ways to Send Email
- Send Email Using Email Alert.
- Send Email Using Core Action.
Read the best salesforce Books: Click Here.
Send Email Using Salesforce Flow
1. Send Email Using Email Alert
If you want to send emails using email alerts then you need to create an email template and email alerts in salesforce. You can create an email template using either the Lightning Email Template or the Classic Email Template in Salesforce. Here we have created a Classic Email Template.
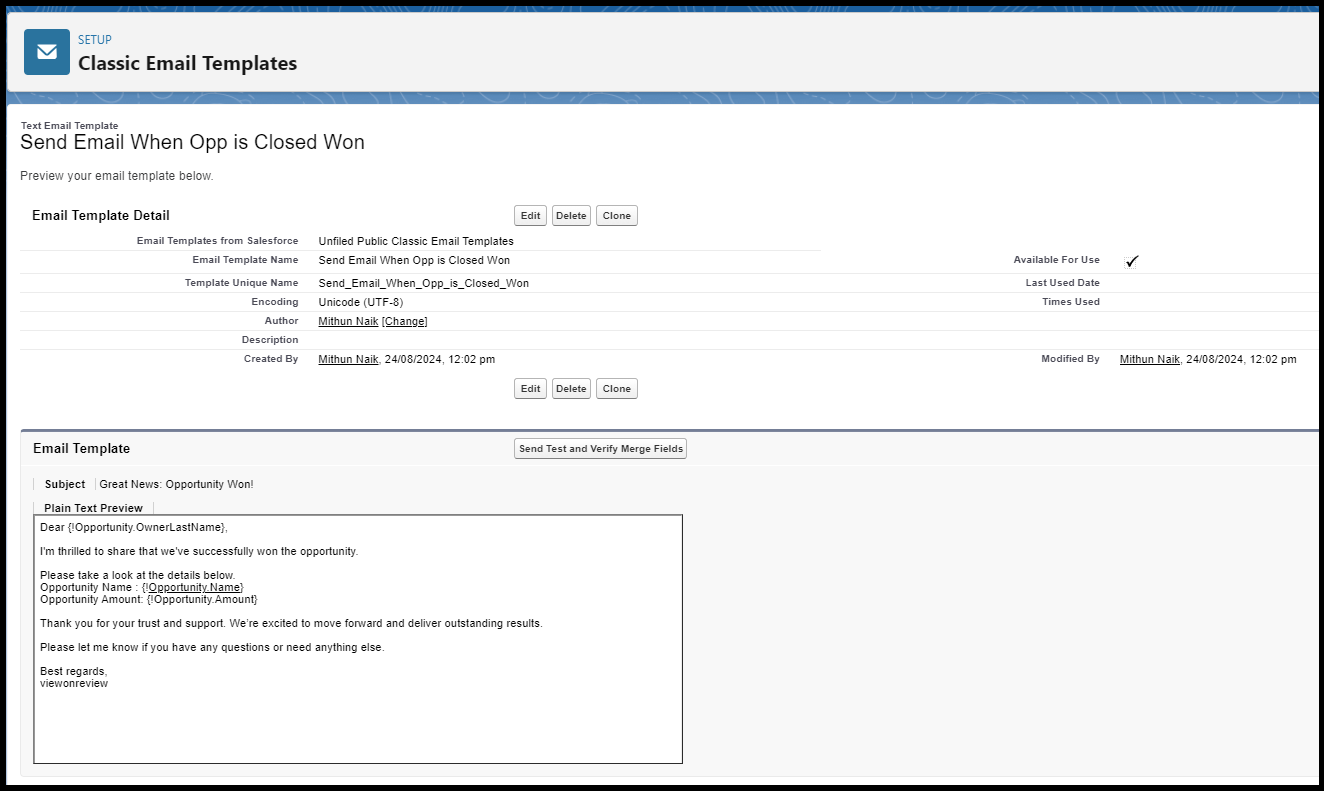
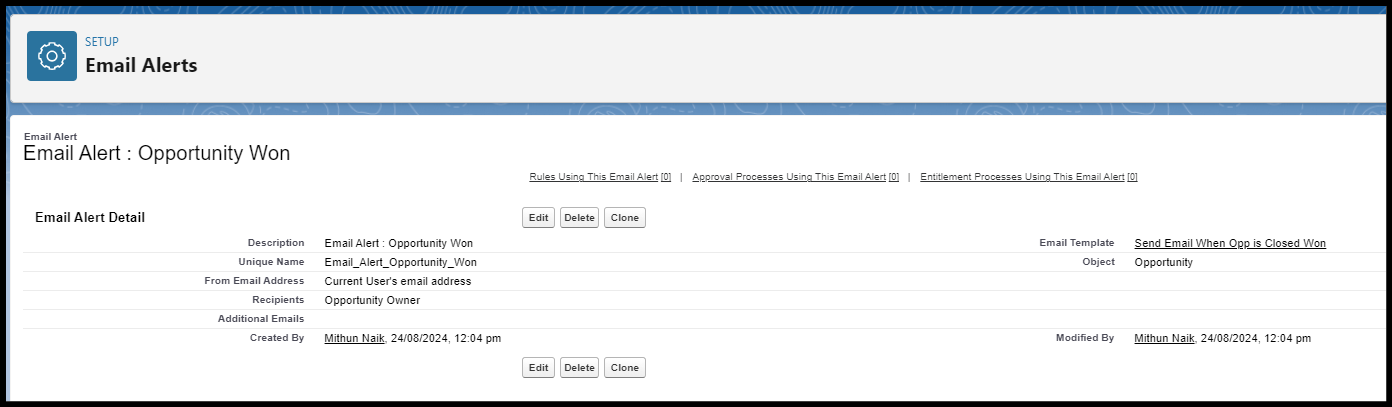
Once the email template is created, then create an email alert.
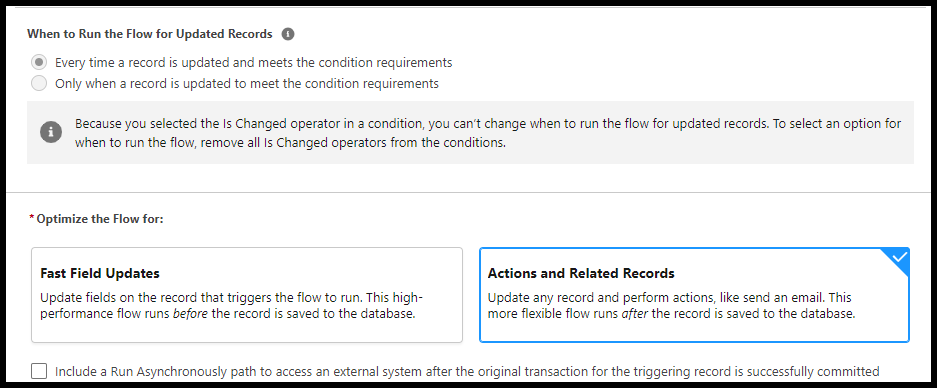
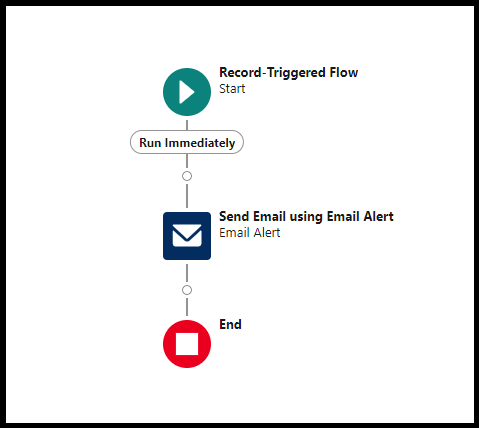
Next, create a record-triggered flow, then use the send email alert action.
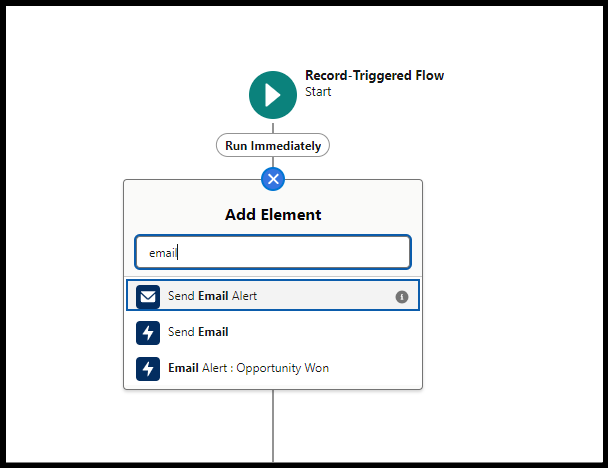
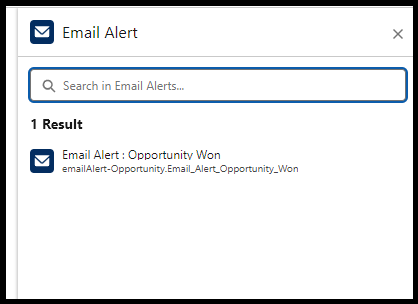
Once you choose “Send Email Alert,” you’ll see a list of available email alerts. If you don’t see any, make sure you’ve configured the email alert with the correct object.
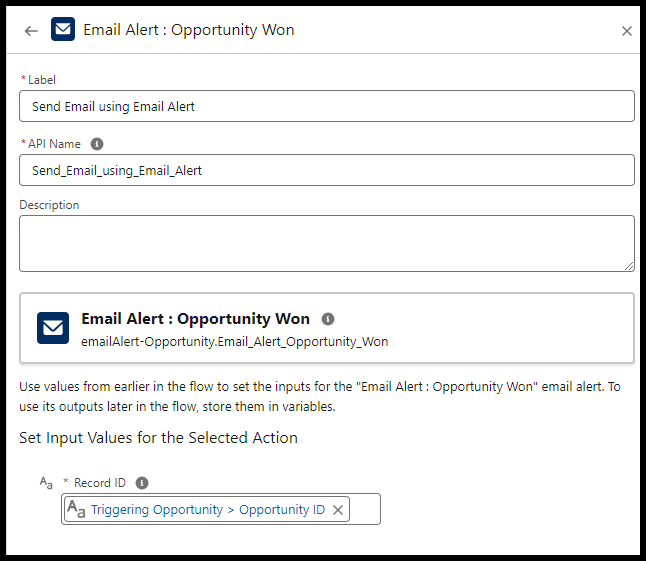
Next, in add a Label and input values for the selected action add record Id.
Now you are done with the flow. Here is what the final flow looks like.
2. Send Email Using Core Action.
Here let’s explore how to use email core action to send an email in salesforce flow. Here we will have the same entry criteria as above.
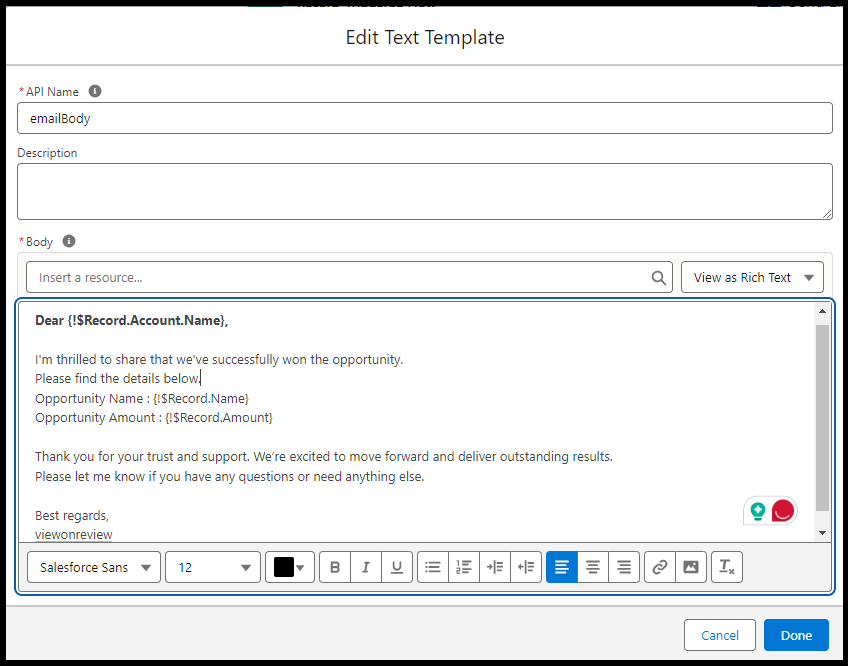
Next, let’s create a text template for the email body. Click New Resource to create.
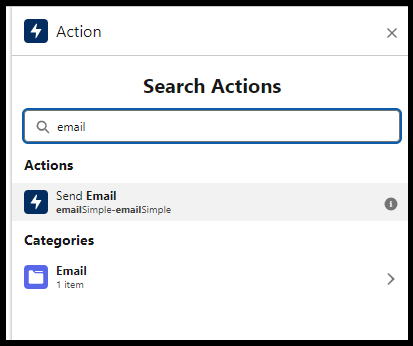
Once created let’s add the action element into flow.

Next search send email action and select it.
Next, add a label. Then choose the variable created as an email body.
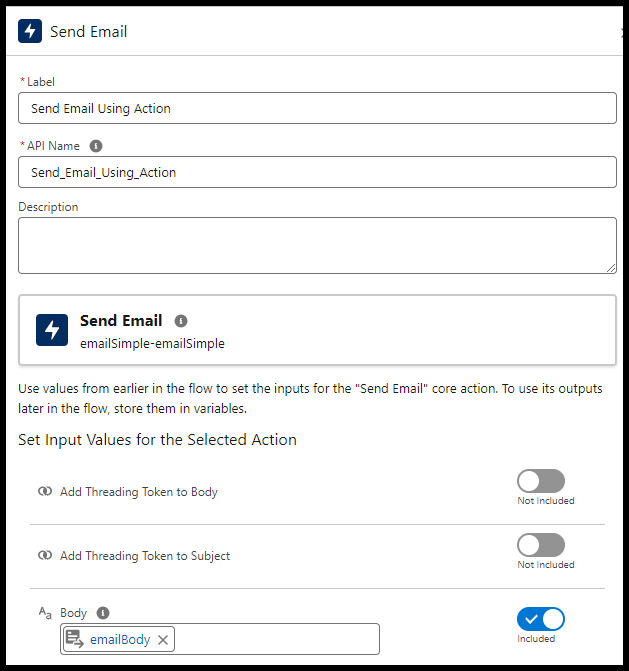
Since I need to send an email to the opportunity owner, I selected the recipient address as the opportunity owner’s email.
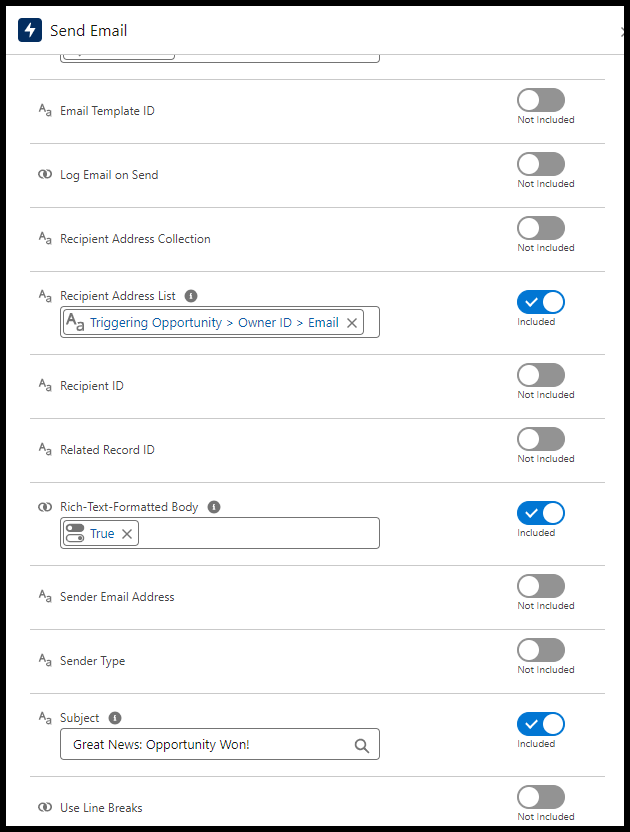
Note: If you don’t set the Rich Text formatted body to true, you’ll receive the email with HTML tags included.
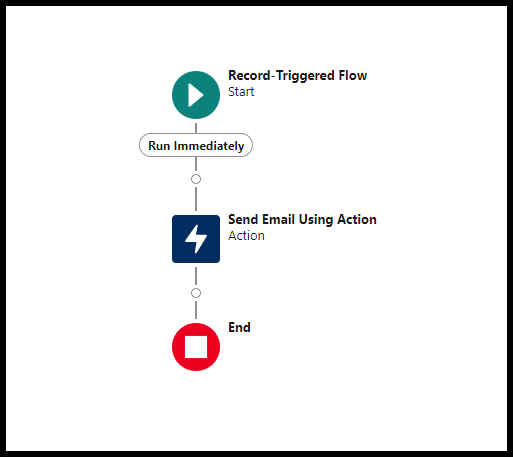
Now we are done with our flow. Save it and test it out,
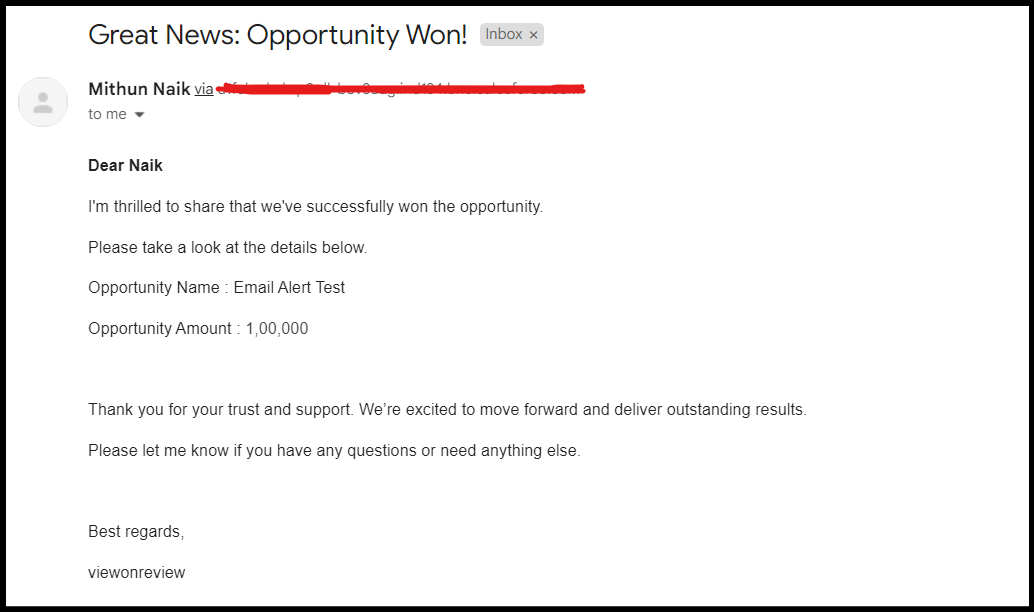
Output
Here is the email I have received, once opportunity is closed won.
Conclusion
In this blog post, I’ve shown how to send an email using the Email Alert and Send Email core action in Salesforce. If you have any questions, feel free to comment.
Winter 25 Update
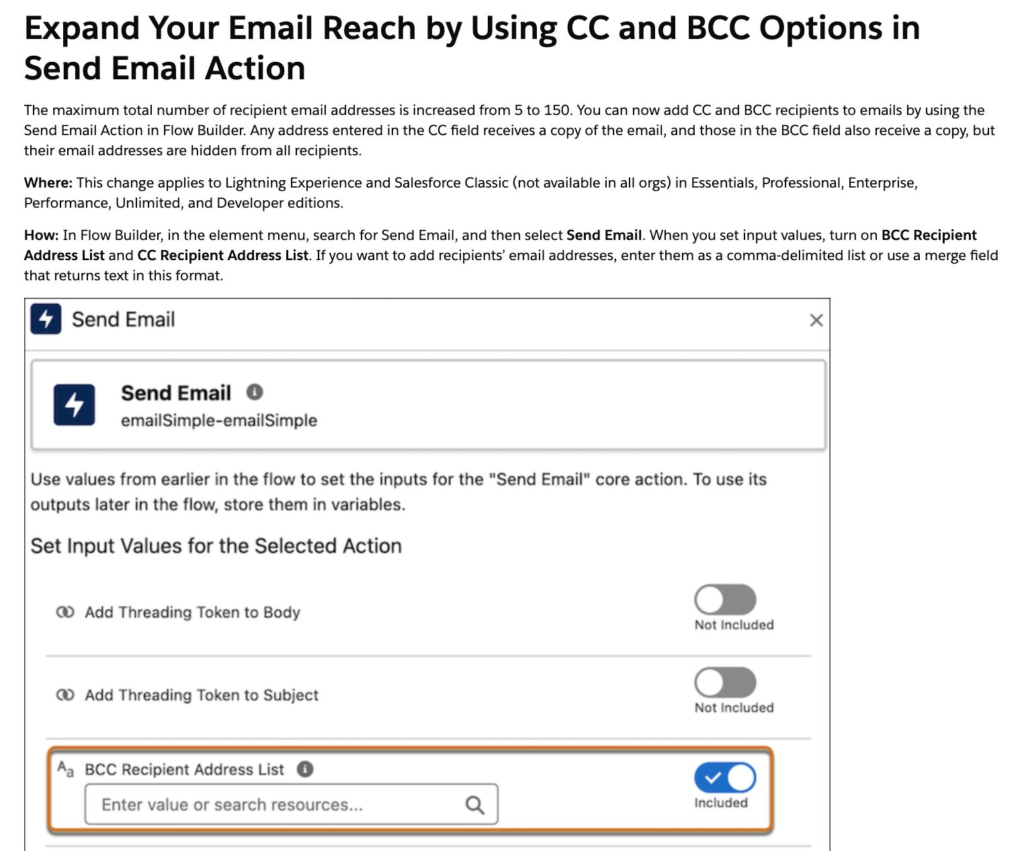
In this post, we saw how we can send email using 2 different methods using flow. Also, we saw what has changed in Summer 23 related to core email action.
Related Quick Links
- Read the best salesforce Books: Click Here.
- HTTP Callout in Salesforce Flow Without Code [GET & POST]
- How to Invoke a Flow from a Lightning Web Component
- How to update child records using salesforce flow
- How to Assign records to Queue using Salesforce Flow?
- How to create a Data Table in Salesforce Flow : Complete Guide.
- How to retrieve record Type Id in flow
- How to navigate record detail page in flow
- How to send email using flow in salesforce
- How to Display Icon In Lightning Datatable
- How to Create Record in lightning Component
- How to Delete Multiple Records Using Checkbox In Lightning Component.
Good one…!
Nice post 🤩
Thank You.
Now I want to schedule it after one day like email is sent after one day of previous days all opportunities.
Hi Kinjal,
If you want schedule a email then please have look to this blog post.
Schedule Triggered Flow in Salesforce
I know this is an older post, but just to be clear if i want to send an email template to a customer they customer must exist as a Lead, Contact or Person account. I cannot use an email field?
HI Yor Yang,
You are saying you want to send email to external customer which is not available in salesforce?
If yes, just go to help article https://help.salesforce.com/s/articleView?id=000392564&type=1.
Let me know if this is not the case.