
One of the ways to use a screen flow in Salesforce is by using Quick Action. Salesforce flow quick action enables the user to perform a series of actions with just a few clicks. In this blog post let’s understand how to call flow from Quick action in Salesforce.
Table of Contents
Launch custom quick action in flow
Leveraging Salesforce Quick Actions within Flows is a seamless and efficient approach for executing tasks. This integration empowers users to automate business processes, capture vital data, and guide individuals through complex workflows—all without the need to navigate away from the current record.
Use Case
Let’s use a simple use case, In the opportunity detail page create a quick action, and when the user clicks quick action show all the contacts available in the related account of the opportunity. Then, the user selects the contact then create a record in the related opportunity contact role [Opportunity Contact Role] record in salesforce.
By solving the above use case, you can understand :
- How to use screen flow to call a Quick Action.
- How to get the current record ID in flow.
- How to use the GET record element.
- How to use the DATA TABLE in screen flow.
- How to use the CREATE RECORD element in screen flow.
- How to use the FAULT PATH in flow.
- How to use the LOOP element in flow.
- How to use the ASSIGNMENT in flow.
Salesforce Screen Flow: Get Current Record ID
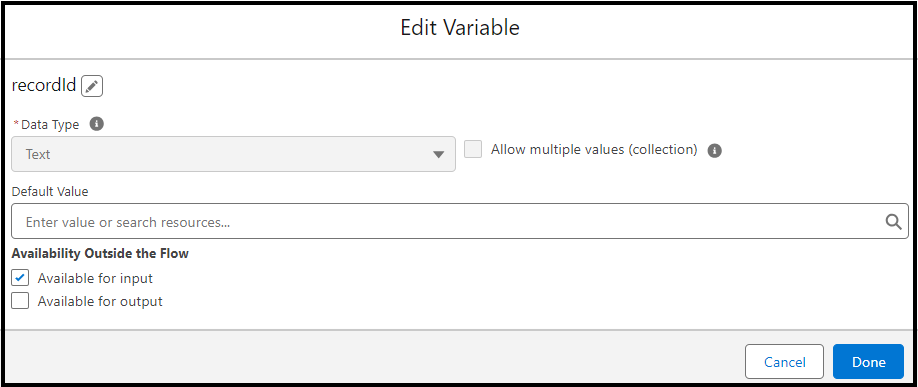
In our example we need a current Opportunity ID, to get that Record ID using salesforce flow then we need to follow the below method.
Go to the toolbox on the left-hand side of the screen and click new resource. Name the API name and choose the Data Type as Text as below shown.
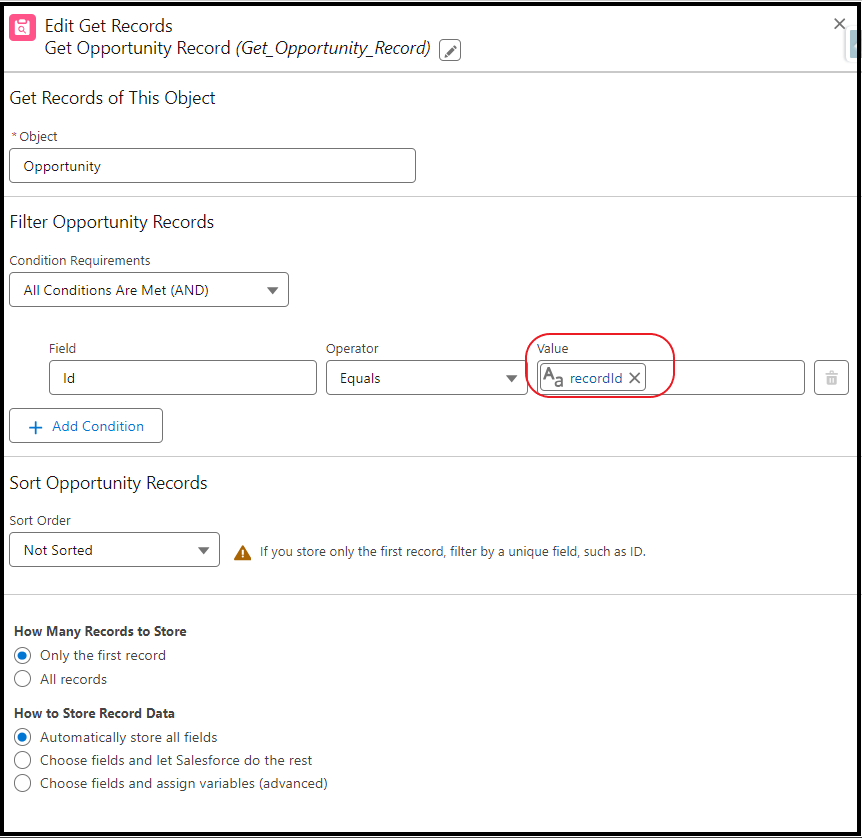
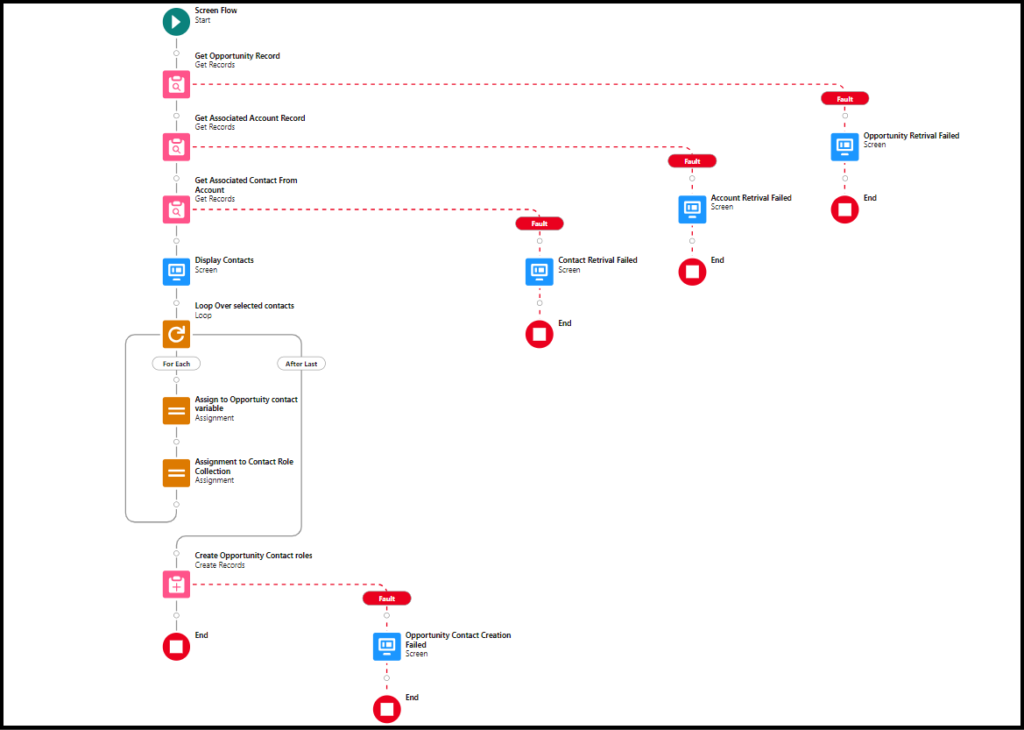
Step 1: GET Opportunity Record
Let’s use the GET element in the flow to get the opportunity record. The variable recordId we can use to get the current opportunity record.
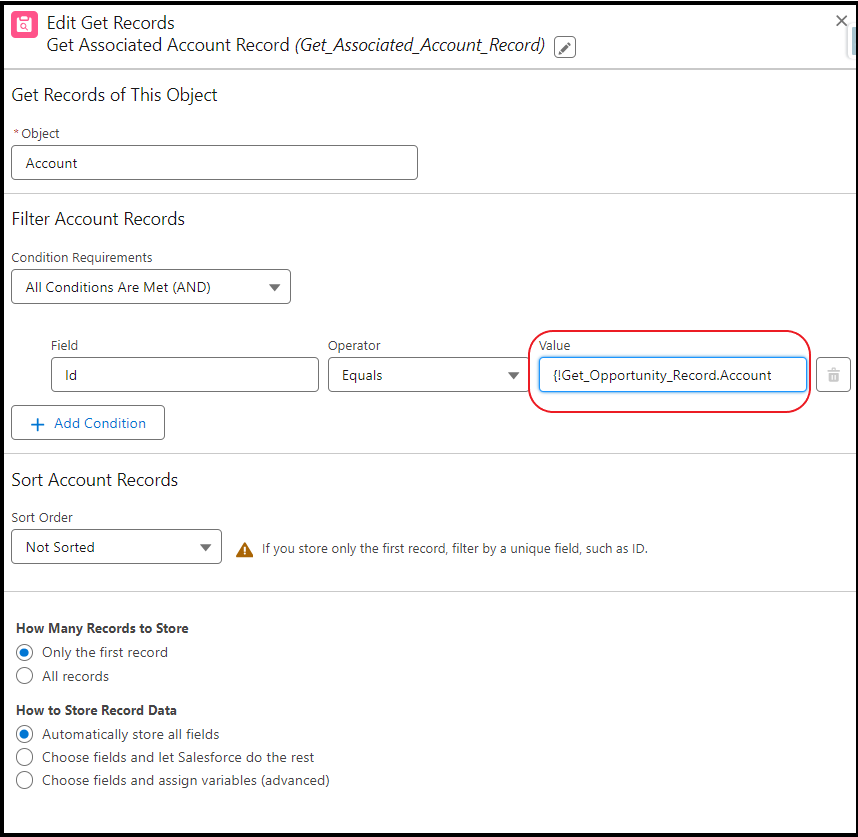
Step 2: GET Related Account
We are using one more GET element to fetch the related account of the current opportunity.
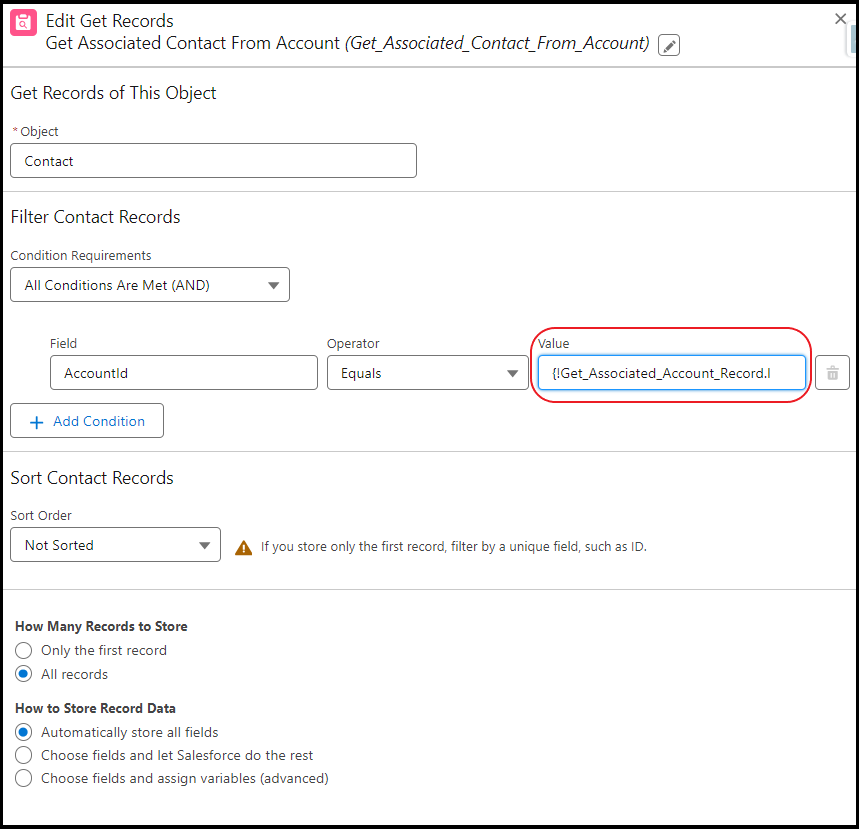
Step 3: GET the Contacts from Account
As we need a contact to create a record in opportunity contact roles, so we are using the get record element to fetch the related contact of the account.
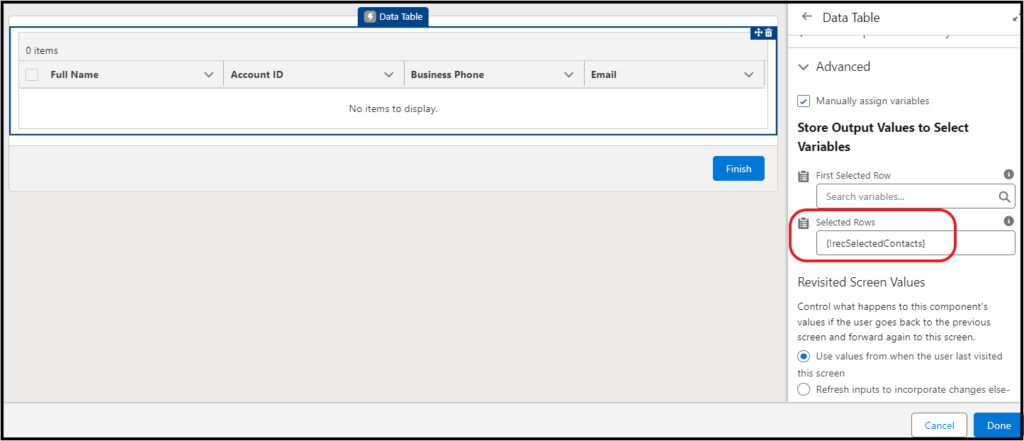
Step 4: Data Table to select the contacts
Once we have all the contacts that are related to the account then let’s create a screen element to display the record using the Data table in flow. In the data table of flow, we will enable the multiple checkbox selection of contacts.
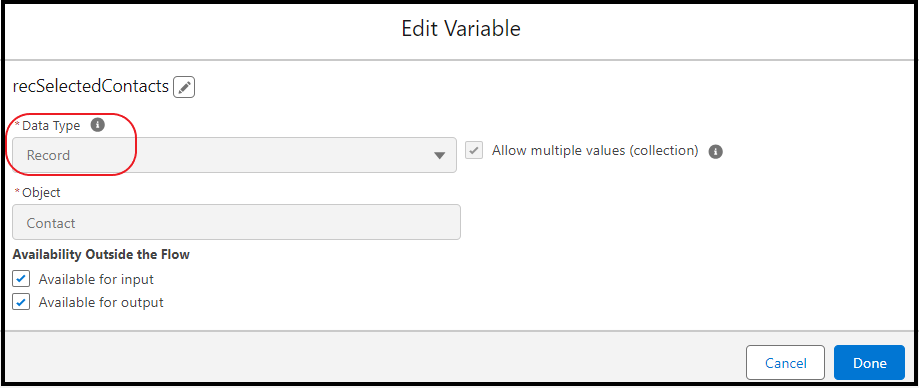
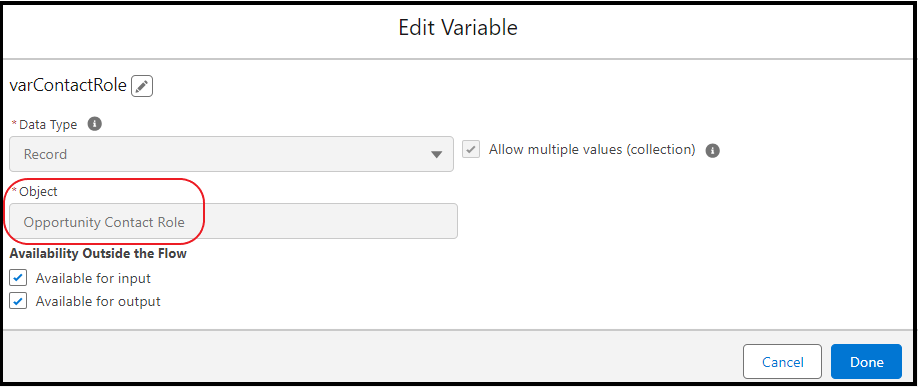
And will store the selected contact in the record collection variable. So first let’s create a record collection variable with data type as Record and object is Contact.
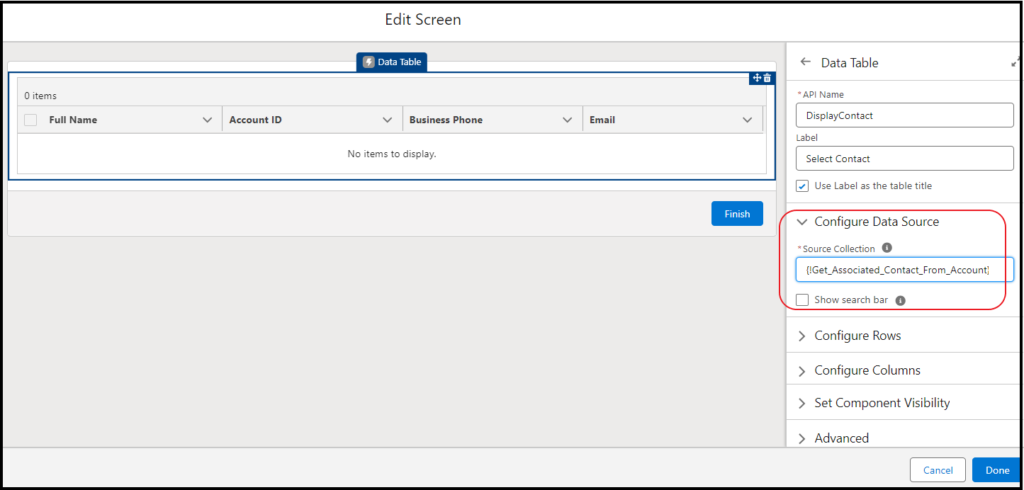
Then let’s add the screen element to the canvas and select the Data table from the available component to the screen element.
To display the record in the Data table we need a collection of records. So, in our use case, we need to show the list of contacts of the Account i.e., which we retrieved in STEP 3, and that can be configured in screen flow as below.
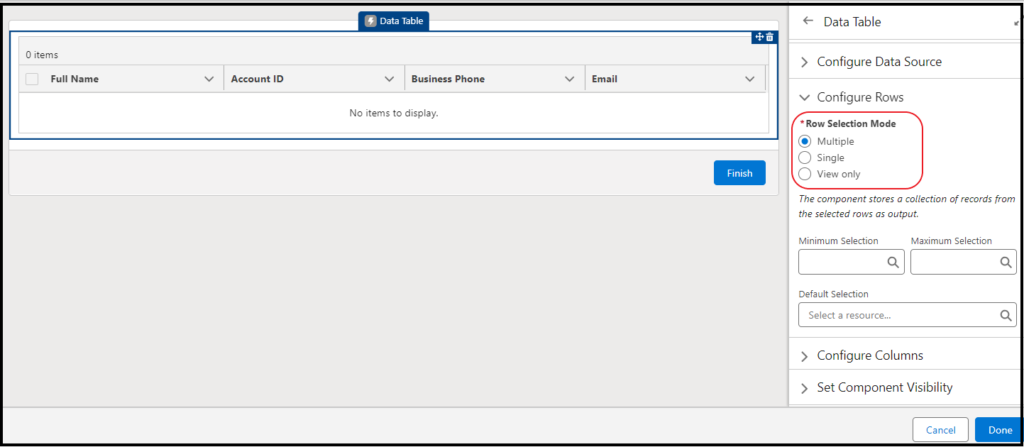
In our data table we are given the option to select multiple records, so in our data table let’s configure the selection of rows as Multiple.
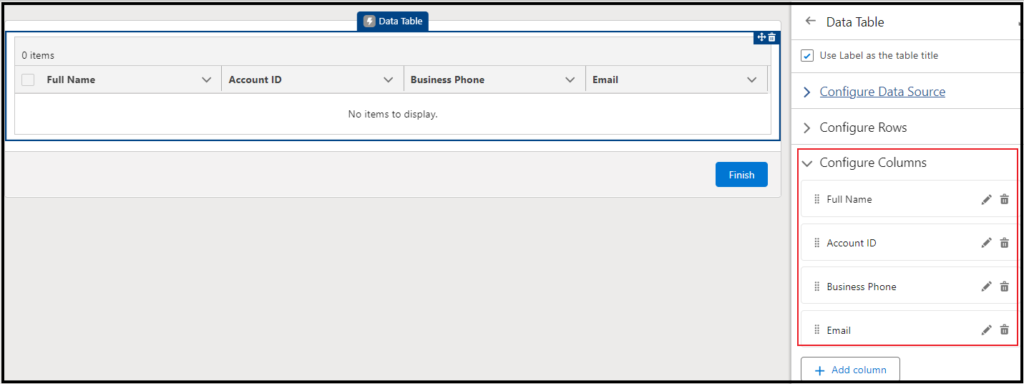
As we are using a Data table, so let’s configure all the columns we need to show.
The final part of the Data table is to hold the selected contact from the user in a collection variable that we created. Which has to be configured as per below.
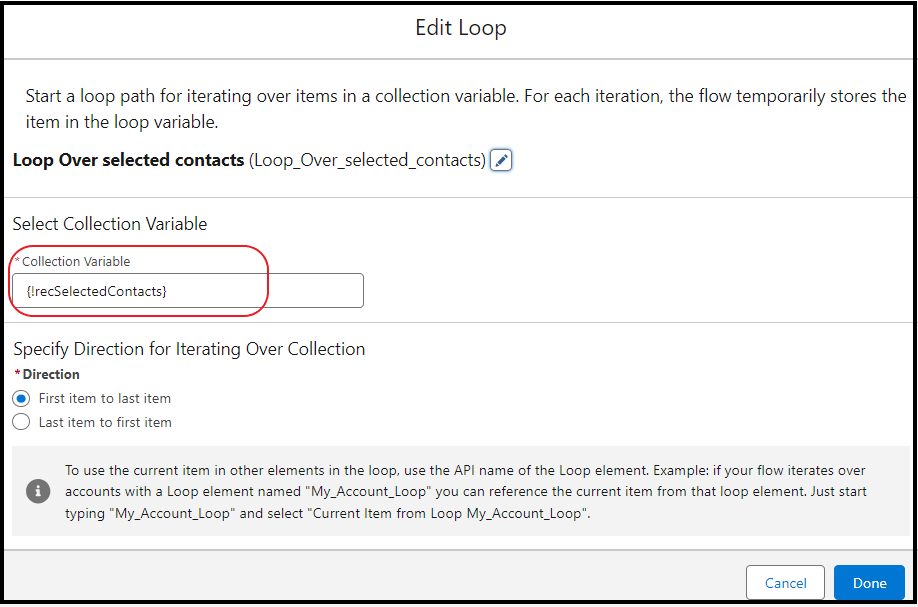
Step 5: Loop Over the Selected Contacts
From the data table, we will have the record collection variable which is selected by the user. So now let’s iterate over those contacts to create an Opportunity contact role.
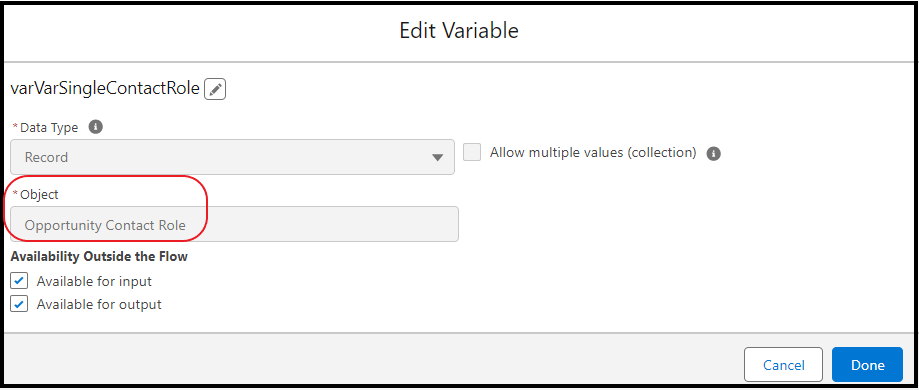
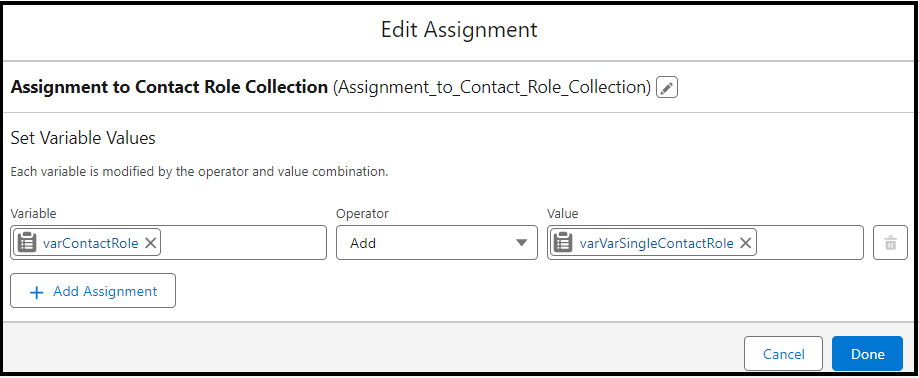
Step 6: Use the Assignment to store the Data as a collection
After looping over each contact we will use the instance of the contact role record variable to assign the value. For that will create a single record collection variable as below. Which will store the value of the corresponding field from the loop,
Used assignment element to use the assign value.
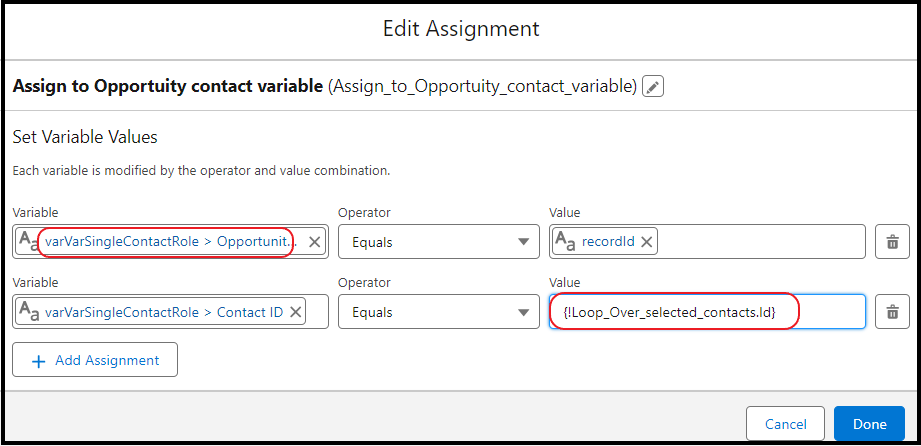
Create an opportunity contact role collection variable to hold the above value. And then add to the collection variable by using the assignment. This is the same as how we use it in apex [Add each record to collection].
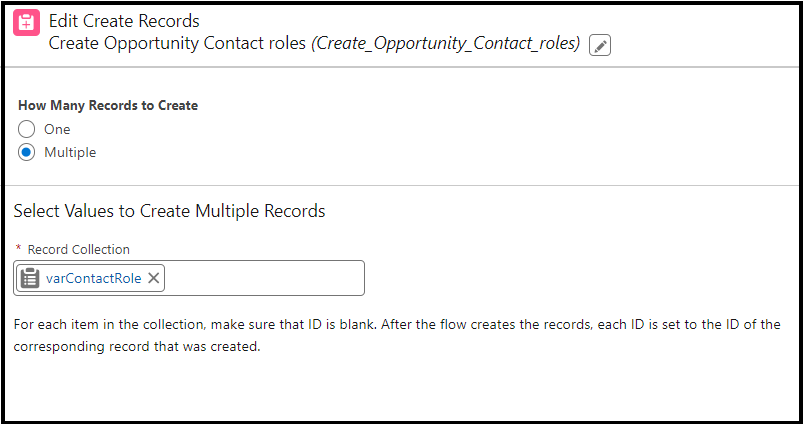
Step 7: Create Record
As we have given multiple contact selections, so we will have more than one to create a record. Add we stored all the records in our opportunity contact role variable collection as above i.e. varContactRole. Will use the same collection variable to create a record as below shown.
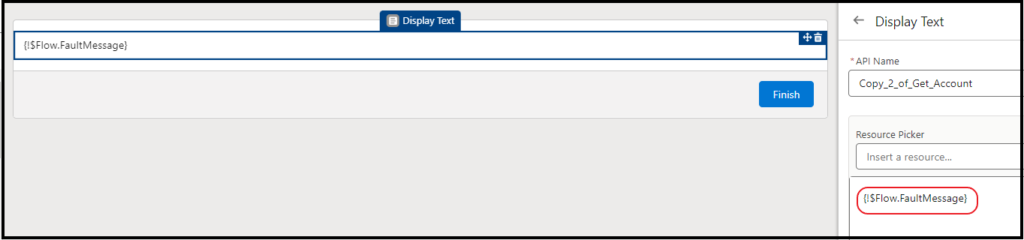
Step 8: Fault Path
This is the final step of our use case, here we will use the fault to handle the kind of exception using Screenfow. It will show an error message if anything occurs. [And also you can trigger an email to admin].
Add a display text component to the screen from the component section and configure the fault path.
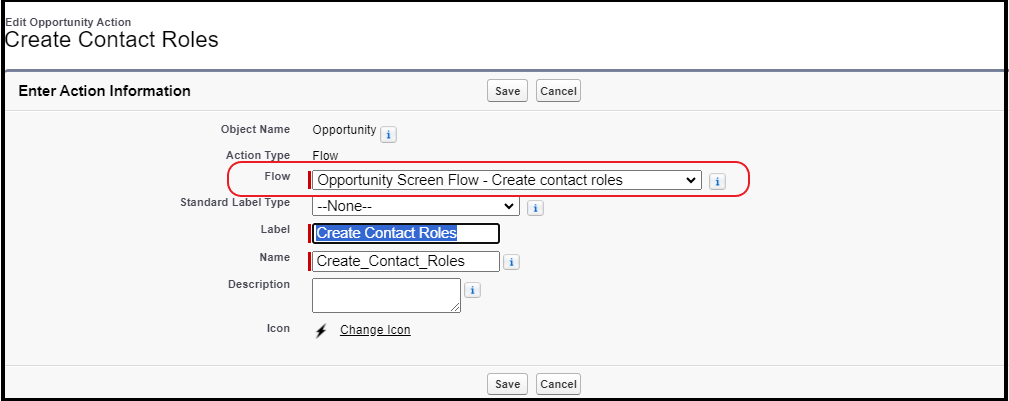
Step 9: Create Quick Action and Add the flow
Once all the above steps are completed activate the flow and Go to Opportunity click Buttons, Links, And Action to create a New Quick Action as below.
Now we are done with our flow let’s see the final look of it.
Conclusion
In this blog post, we understood a detailed view of the Data table, other elements of the screen flow, and how to use the Quick action in salesforce flow. Feel free to follow our other blog post related to Salesforce Flow.
Also Read
- Read the best salesforce Books: Click Here.
- HTTP Callout in Salesforce Flow Without Code [GET & POST]
- How to Invoke a Flow from a Lightning Web Component
- How to update child records using salesforce flow
- How to Assign records to Queue using Salesforce Flow?
- How to create a Data Table in Salesforce Flow : Complete Guide.
- How to retrieve record Type Id in flow
- How to navigate record detail page in flow
- How to send email using flow in salesforce
- How to Display Icon In Lightning Datatable
- How to Create Record in lightning Component
- How to Delete Multiple Records Using Checkbox In Lightning Component.