
The screen flow is one of the flow types that is available in the Salesforce flow builder, which needs interaction from the user. Screen flow in Salesforce has an interactive user screen, which has forms, buttons, radio choices, and many more. In Salesforce screen flow can be launched from lightning pages, experience cloud sites, quick actions, and more.
Table of Contents
How to create a screen flow in Salesforce?
Alright, before jumping into creating a screen flow, let’s understand what we can do in the screen element.
There are a total of 50 input components available as of today and 2 display components. Like in the screen flow, you can ask the user to enter Address information, select the checkbox, etc, and show the data table, lookup, display image, And also you can ask for file upload and many more.
How many ways to create a record from screen flow?
Currently, there are two ways you can create a record in screen flow.
- Create a blank screen drag the required input components to create a record and map these input components to object fields to create a record element.
- Example: to create a simple account record in flow, you can drag name, phone, and email fields from input components and map these fields to corresponding account object fields in the create record element.
- On your screen, there is a second tab called “Fields” which includes a record field in your screen, use a predefined field from a record variable instead of creating a new screen component. Some field types aren’t supported. Later in the flow, use a Create Records or Update Records element to save the field values in Salesforce.
- Example: Create a new object data type resource say for an account object. And once done you will see all the fields available in the account object in the fields tab of the screen flow. Drag what all fields need to screen and in create record element use this record variable created to create a record.
Use Case
Let’s create a simple screen flow on the account detail page to create a contact. Also, let’s see how to pass the record ID.
As I explained two approaches to create records in screen flow, let us see the first one.
In Salesforce, Org go to Home and search flow then click new flow to create a new flow. Then new flow screen click Screen Flow and click Create.
Salesforce Screen Flow: Get Current Record ID
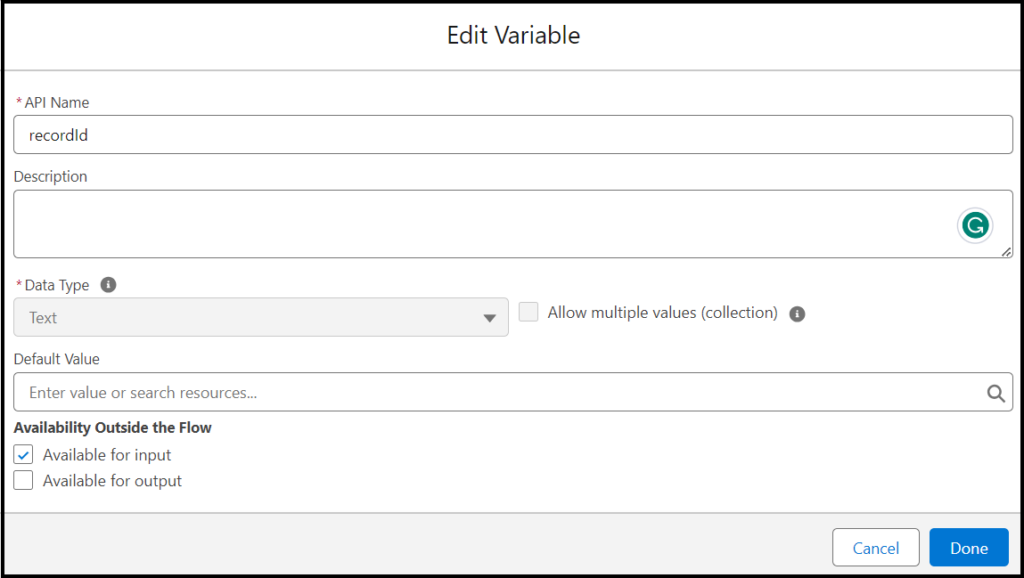
To relate a contact with the account we need the account record Id. To get the current record ID in screen flow we need to create a variable as below.
Go to the toolbox on the left-hand side of the screen and click new resource. Name the API name and choose the Data Type as Text as below shown.
The record ID is the input variable being passed from the lightning record page. See the image added below in the blog post.
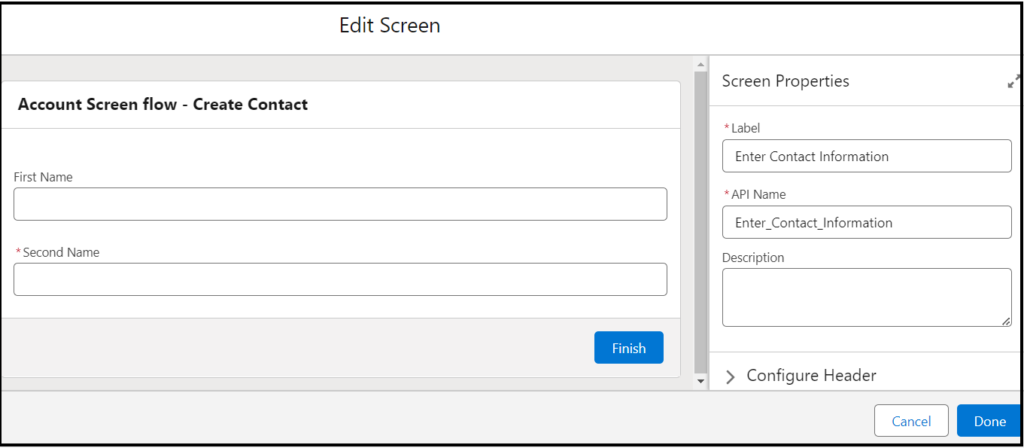
Then Click the (+) icon and add the screen interaction element. And label the screen properties. In the configure header and footer section review how the screen should look.
Next, drag the two input text components to the canvas screen element. Then for these two components give the label and define other properties accordingly.
- Label: First Name API Name: First_Name
- Label: Second Name API Name: Second_Name. Require checkBox is true.
Choose the footer and click Done.
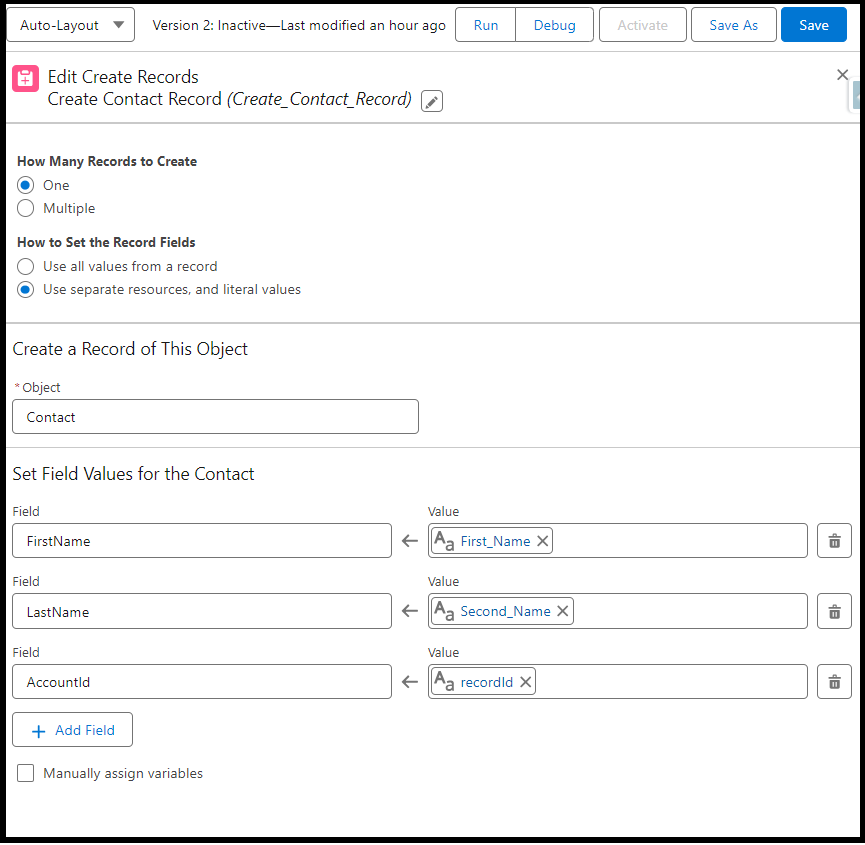
Next, Click the (+) icon and add the create record element to the canvas. Give the label and API name automatically populated.
- How Many Records to Create – Choose One.
- How to Set the Record Fields – Select separate resources and literal values.
- Create a Record of This Object – Select Contact.
- Set Field Values for the Contact – Here you need to choose the contact fields on the left-hand side and the right side are the screen components.
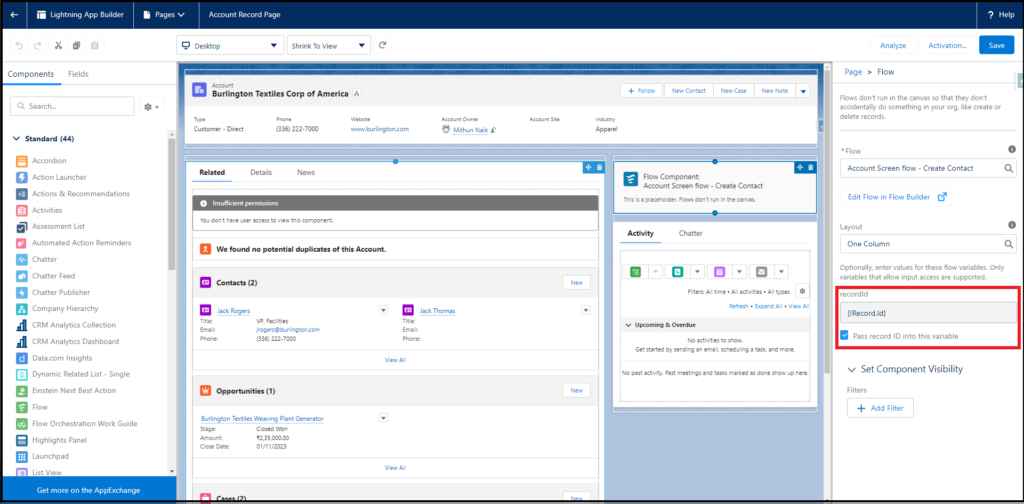
So now we are done with the screen flow and let’s add the screen flow to the detail page, also let’s see how the record ID, is being passed.

Now let’s see another approach in screen flow to create a record from the fields tab.
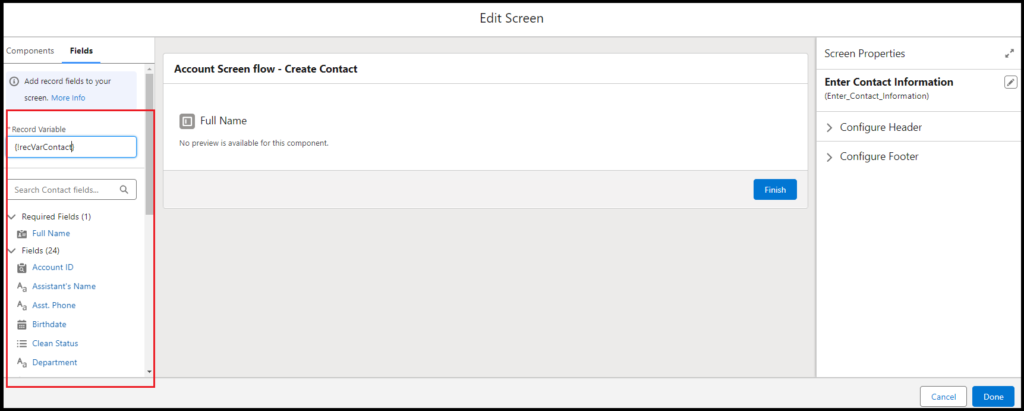
Click the (+) icon and add the screen element to the screen. Then go to the Fields tab then create a new record variable by clicking new resource. Give API name, Data type as Record, and choose object Contact.

Once the record variable resource is created, all the fields will be shown in the fields tab. As per our requirement drag Name into the screen and click Done.
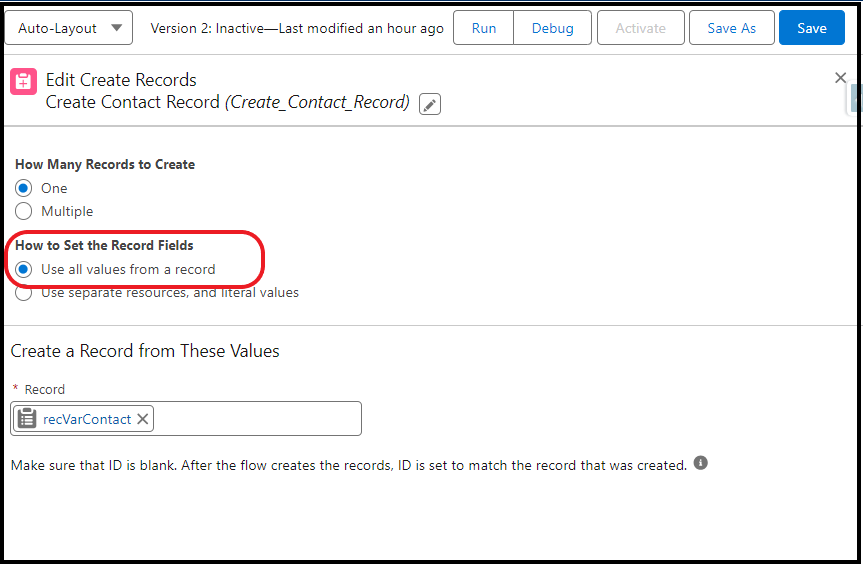
Then click (+) and add the create record element. Give the Label and API name.
- How Many Records to Create – Choose One.
- How to Set the Record Fields – Choose Use all values from a record.
- Create a Record from These Values – Choose the record variable created.
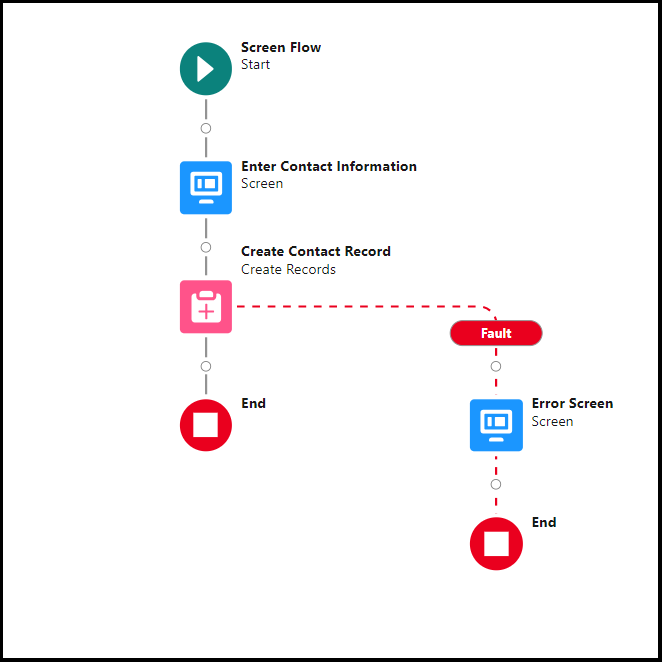
Save the flow and let’s check it out. [For both approaches same image].
How to call flow from quick action in Salesforce
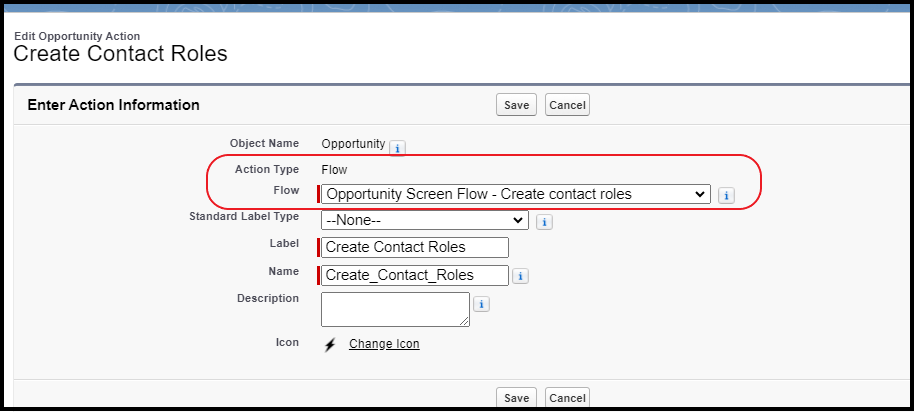
The screen flow can be used in quick action as well. Create a screen flow, then in the object manager create a custom action [Rfer the below Snapshot ] then add the custom action into Page Layout. You are ready to use quick action as well using screen flow in Salesforce.
For quick action using salesforce flow, I have created a dedicated post here. Check it out.
Conclusion
In this blog post, we learned how to create a record using screen flow in Salesforce. If you have any question please feel free to drop it. And will cover more functionality of screen flow in our next post. Also don’t forget to follow our other posts.
Related Quick Links
- Get Started with Screen Flows Unit | Salesforce Trailhead
- HTTP Callout in Salesforce Flow Without Code [GET & POST]
- How to Invoke a Flow from a Lightning Web Component
- How to update child records using salesforce flow
- How to Assign records to Queue using Salesforce Flow?
- How to create a Data Table in Salesforce Flow : Complete Guide.
- How to retrieve record Type Id in flow
- How to navigate record detail page in flow
- How to send email using flow in salesforce
- How to Display Icon In Lightning Datatable
- How to Create Record in lightning Component
- How to Delete Multiple Records Using Checkbox In Lightning Component.