
Hello Everyone, in this post I will show you, how you can build your first lightning component. Let’s begin.
Table of Contents
What is Salesforce Lightning?
Lightning includes the Lightning Component Framework and some exciting tools for developers. Lightning makes it easier to build responsive applications for any device. Lightning components accelerate development and app performance.
- Lightning Experience — The new UI for SalesForce.
- Lightning Design System — A CSS framework and component library for building Lightning-styled apps.
- Lightning Framework — A Javascript framework for creating single-page applications and Lightning Components.
Now you have an idea of what is Lightning. Let’s move forward.
What Is the Lightning Component Framework?
The Lightning Component framework is a UI framework for developing web apps for mobile and desktop devices. It’s a modern framework for building single-page applications with dynamic, responsive user interfaces for Lightning Platform apps. It uses JavaScript on the client-side and Apex on the server-side.

The client-side refers to the UI and the Server-side refers to the backend. It is really important that you know what is Client-side and Server-side are. If you are confused about these, don’t worry maybe will be covering them in the upcoming post.
Now let’s understand what is Component attributes in the Lightning component.
Read the best salesforce Books: Click Here.
Component Attributes
Component attributes are like member variables on a class in Apex. They are typed fields that are set on a specific instance of a component and can be referenced from within the component’s markup using an expression syntax.
<aura:attribute name="whom" type="String" default="world"/>
    Hello {!v.whom}!
Here the output is:- Hello world.
Expression
Salesforce lightning Expression allows you to make calculations and access property values and is evaluated and dynamically replaced when the component is evaluated.
Syntax is {!<expression>}
There are other types of Basic types, Standard and Custom Object Types, Collection Types, and Other types of attributes we can write in Aura, below are the examples, and refer to the official documentation of Salesforce for more.
<aura:attribute name="showDetail" type="Boolean" />

<aura:attribute name="startDate" type="Date" />

<aura:attribute name="acct" type="Account" />

<aura:attribute name="expense" type="Expense__c" />

<aura:attribute name="colorPalette" type="List" default="['red', 'green', 'blue']" />
Yay!! Now you will know what is an attribute, expression, collection, etc. Now let’s build a lightning application using these. Let’s understand first, what is a lightning bundle. There is a total of 8 parts included in the bundle, in that I will tell you 4 important parts.
- Component
- Controller
- Helper
- Apex Controller
Here first 3 will be working on the Client-side server and the apex work on a server side. Uff!! Hope you are with me. Now let’s create a lightning application. we are creating a Calculator application, in that, I will show you different types of implementation.
- Lightning Component without the attribute.
- Lightning Component with attribute.
- Lightning component with Apex controller.
Lightning Component without the attribute.
To create a lightning Component ->Goto-> Developer console ->New->Choose Lightning Component -> Give Name -> Click Submit.
To create a lightning Application ->Goto-> Developer Console -> New -> Choose Lightning Application -> Give Name ->Click Submit.
In this example let’s understand how to create a lightning component without using an attribute tag, how to use aura:id, and how to get and find the value of aura:id.
Calculator.cmp
<aura:component>
    <div>
        <B> Calculator </B>
    </div><br/>
    <div>
        <ui:inputnumber label="First Number" aura:id="FrstNum"/>
    </div><br/>
    <div>
        <ui:inputnumber label="Second Number" aura:id="SecNum"/>
    </div><br/>
    <div>
        <ui:inputnumber label="Total:" aura:id="sum"/>
    </div><br/>
    <div>
        <ui:button label="Calcualte" press="{!c.sum}" class="button"/>
    </div>
</aura:component>
Calculator.js
({
	sum : function(component, event, helper) {
        //To get the value entered in the place of FirstNumber.
        //we are using find method,and using get method to get the value.
        //Inside find we need to add aura:id
		var frstNumber = component.find("FrstNum").get("v.value");
        console.log("Entered First Number is :" +frstNumber);

        var SecndNumber = component.find("SecNum").get("v.value");
        console.log("Entered Second Number is :" +SecndNumber);

        var ResultSum = component.find("sum");
        //Calculating sum and setting to the variable and assigning by using set.
        //we are assigning for aura:id so we are using v.value.
       	ResultSum.set("v.value",frstNumber+SecndNumber);

	}
})
Calculator.app
<aura:application>
	<c:Calculator></c:Calculator/>
</aura:application>
Lightning Component with attribute.
In this let’s understand how to create an attribute tag in the aura, how to assign value and how to get a value from it.
Calculator.cmp
<aura:component>
    <aura:attribute name="Fnumber" type="Integer"/>
     <aura:attribute name="Snumber" type="Integer"/>
     <aura:attribute name="Totalnumber" type="Integer"/>
    <div>
        <B> Calculator </B>
    </div><br/>
    <div>
        <ui:inputnumber label="First Number" value="{!v.Fnumber}"/>
    </div><br/>
    <div>
        <ui:inputnumber label="Second Number"  value="{!v.Snumber}"/>
    </div><br/>
    <div>
        <ui:inputnumber label="Total:" value="{!v.Totalnumber}"/>
    </div><br/>
    <div>
        <ui:button label="Calcualte" press="{!c.sum}" class="button"/>
    </div>
</aura:component>
Calculator.js
({
    sum : function(component, event, helper) {
        //Get the Value that being entered in first Number
        var frstNumber = component.get("v.Fnumber");
        console.log("Entered First Number is :" +frstNumber);
        //Get the Value that being entered in Second Number
        var SecndNumber = component.get("v.Snumber");
        console.log("Entered Second Number is :" +SecndNumber);
        //calculated the  sum and assigning to attribute by using set.
        component.set("v.Totalnumber",frstNumber+SecndNumber);

    }
})
Calculator.app
<aura:application>
	<c:Calculator></c:Calculator/>
</aura:application>
Lightning component with Apex controller.
In this let’s understand how to invoke the apex controller, how to call a class in CMP file, and how to pass a parameter to the apex method from the aura.
Calcualtor.cmp
<!--Adding Apex class name in controller-->
<aura:component controller="Calculator" >
    <aura:attribute name="Fnumber" type="Integer"/>
    <aura:attribute name="Snumber" type="Integer"/>
    <aura:attribute name="Totalnumber" type="Integer"/>
    <div>
        <B> Calculator </B>
    </div><br/>
    <div>
        <ui:inputnumber label="First Number" value="{!v.Fnumber}"/>
    </div><br/>
    <div>
        <ui:inputnumber label="Second Number"  value="{!v.Snumber}"/>
    </div><br/>
    <div>
        <ui:inputnumber label="Total:" value="{!v.Totalnumber}"/>
    </div><br/>
    <div>
        <ui:button label="Calcualte" press="{!c.sum}" class="button"/>
    </div>
</aura:component>
Calcualtor.js
({
    sum : function(component, event, helper) {
        //Get the Value that being entered in first Number
        var frstNumber = component.get("v.Fnumber");
        console.log("Entered First Number is :" +frstNumber);
        //Get the Value that being entered in Second Number
        var SecndNumber = component.get("v.Snumber");
        console.log("Entered Second Number is :" +SecndNumber);
        //Calling Apex method[i.e Server Side]
        var action = component.get('c.calculateSum');
        //Paasing parameter to the apex method
        action.setParams({
            "fnumber" : frstNumber,
            "Snumber" : SecndNumber});
        action.setCallback(this, function(response){
            var state = response.getState();
            //Checking the state
            if(state === "SUCCESS"){
                //Returns and set the value from the apex to attribute
                component.set("v.Totalnumber",response.getReturnValue());
            }
        });
         $A.enqueueAction(action);
    }
 })
Calculator.apxc
public class Calculator {
@AuraEnabled
    public static decimal calculateSum(decimal fnumber, decimal Snumber){
        decimal sum =fnumber+Snumber;
        return sum;
    }
}
Calcualtor.app
<aura:application>
	<c:Calculator></c:Calculator/>
</aura:application>
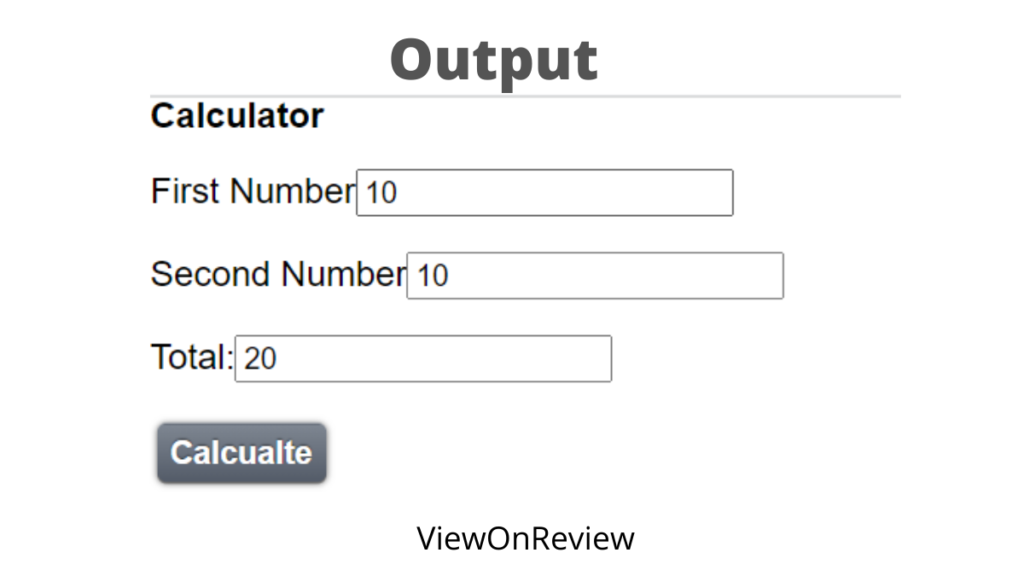
Output
Conclusion
Now we have successfully built three lightning Components. Isn’t interesting. That’s all for this post, in the next post we can learn to create records and display the records. If you have liked this blog post please do share it with your loved ones.
Some Useful Links
- Aura Components Basics
- Salesforce Developers
- Lightning Design System
- Salesforce Developers
- Get Started with Lightning Experience
- Salesforce Developers
- Read the best salesforce Books: Click Here.
- HTTP Callout in Salesforce Flow Without Code [GET & POST]
- How to Invoke a Flow from a Lightning Web Component
- How to update child records using salesforce flow
- How to Assign records to Queue using Salesforce Flow?
- How to create a Data Table in Salesforce Flow : Complete Guide.
- How to retrieve record Type Id in flow
- How to navigate record detail page in flow
- How to send email using flow in salesforce
- How to Display Icon In Lightning Datatable
- How to Create Record in lightning Component
- How to Delete Multiple Records Using Checkbox In Lightning Component.